在 Synology DS923+ 安裝 Jellyfin 及 Immich 來管理影片跟照片
- Leo
- 技術宅 ( tech geek)
- 2026年1月4日
目錄
由於照片跟影片數量越來越多,放在雲端硬碟不僅成本越來越高,而且觀看體驗也不佳,所以決定入手 NAS 並且自己架設多媒體系統來管理及提升觀賞體驗。
目前的照片及影片約 2TB,考量到 RAID 及未來擴充性,選擇入手 Synology DiskStation DS923+ 搭配四顆 4TB 的硬碟組成 RAID 5,約有 10TB 的可用空間。 若未來還有更多容量的需求,還可以透過 Expansion Unit DX517 來增加五顆硬碟,以個人家庭方案使用完全綽綽有餘。
關於我的詳細備份策略及簡單網路架構可以參考 身為工程師兼攝影愛好者的 3-2-1 備份策略
軟體選用
我使用 Jellyfin 作為影片的管理系統,而照片則使用 Immich。
由於 Jellyfin 是全開源免費。不僅簡單易用,還可以建立多組帳號及權限,讓家庭內每個成員都可以有自己的影音資料庫。
甚至還可以多人在不同裝置上同時同步看影片,不失為一種遠距離情侶感情加溫的方式呢。
Immich 則是開源可自架的照片管理工具中最成熟也最像 Google 相簿的選擇了,不僅有網頁版,也有手機版 (Android / iOS 雙平台),且都積極維護中。
最重要的是,除了傳統透過上傳的方式導入照片外,也可以設定 external library 類似於直接從本地資料夾讀取照片,等於我可以修圖輸出後直接透過 Immich 分享照片且隨時更新!
很可惜至今的版本若使用
external library導入的照片如果原檔案被編輯過了,Immich 當前的做法會把該照片作為一張全新的照片重新導入;也就是說如果你本來有將該照片加入相簿中,就必須重新加入,且不會有版本標記。若使用傳統上傳導入則沒有此問題。
安裝方法
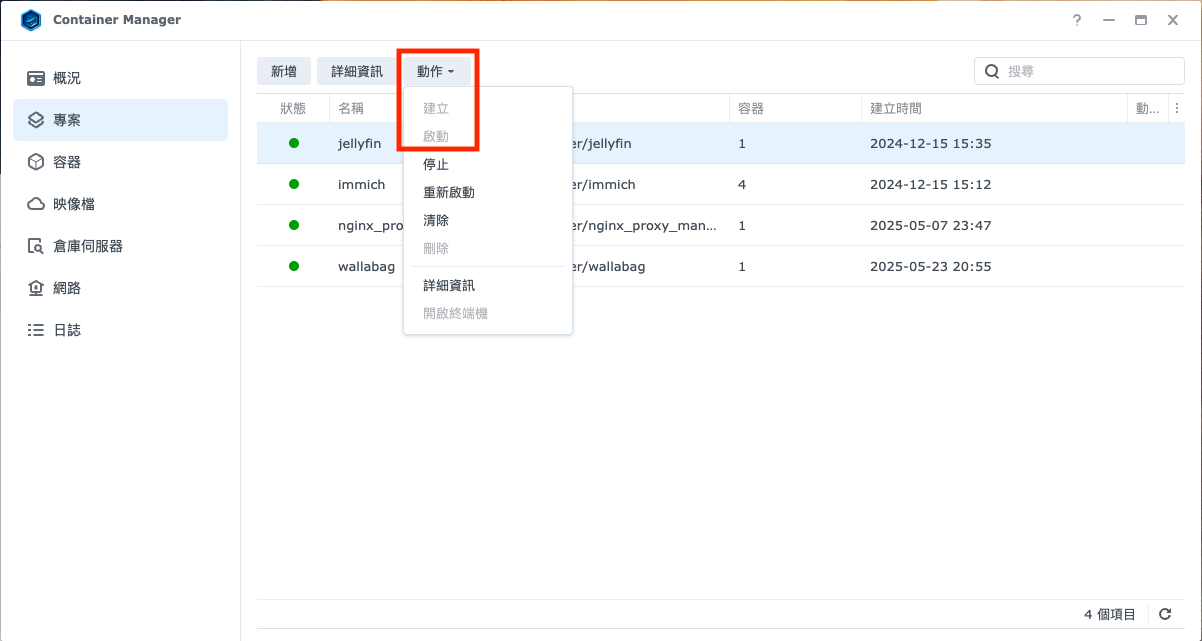
不論 Jellyfin 或 Immich 我都是透過 Docker 部署在 NAS 上,安裝、維護及監控都相當容易。
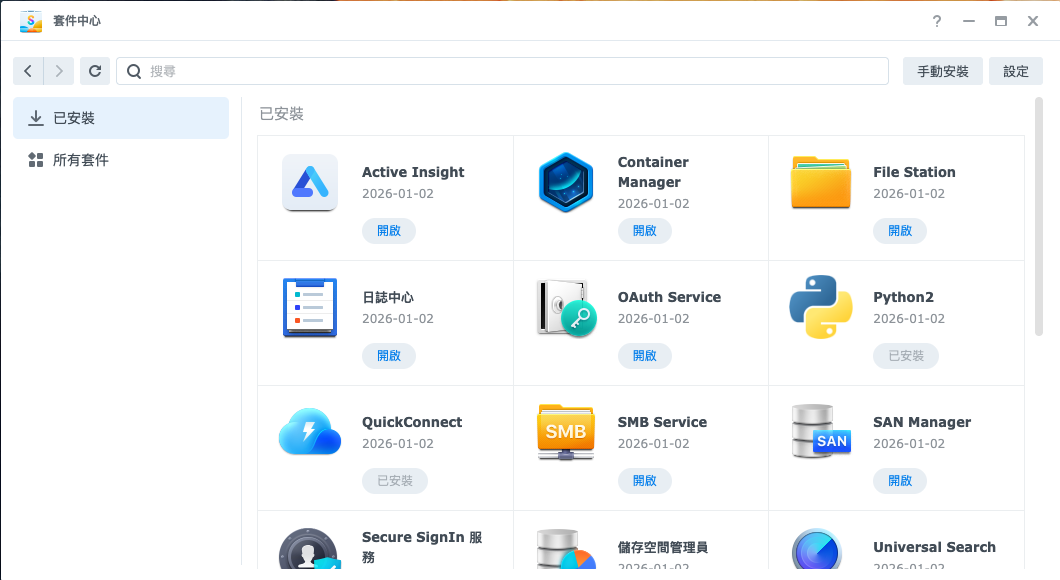
只要在 Synology NAS 的套件中心安裝 Container Manager 就可以透過視覺化的方式管理 Docker 容器。
接著就可以創建新的專案來建立 Jellyfin 或 Immich 了
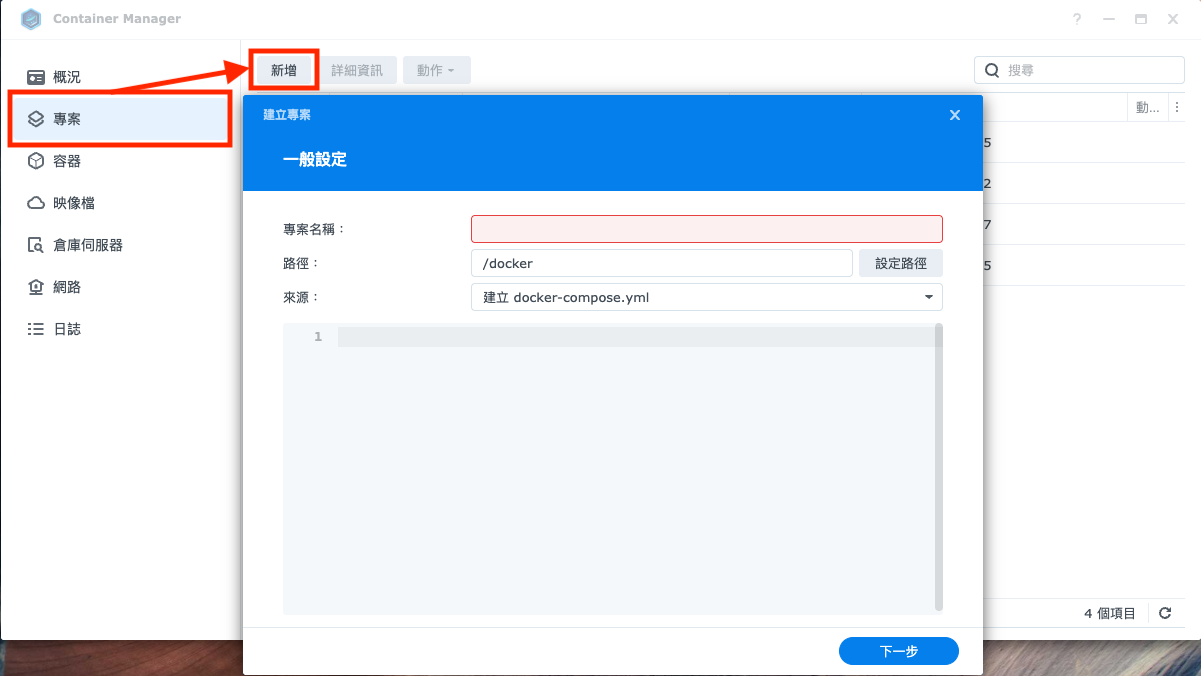
專案路徑建議可以依照不同項目放在各自的資料夾中,其中每個專案資料夾內都要有一個 compose.yml 作為啟動 Docker 專案的設定,immich 內還有對應的 .env 檔案,然後根據掛載的本地路徑,添加對應的資料夾。
docker/
├── immich
│   ├── compose.yml
│   ├── .env
│   ├── portfolio
│   ├── postgres
│   └── upload
└── jellyfin
    ├── compose.yml
    ├── config
    ├── movies
    └── tvshows
Jellyfin 的 Docker Compose
# This file is auto-generated by openmediavault (https://www.openmediavault.org)
# WARNING: Do not edit this file, your changes will get lost.

# Jellyfin
#
---
# https://hub.docker.com/r/linuxserver/jellyfin
services:
  jellyfin:
    image: lscr.io/linuxserver/jellyfin:latest
    container_name: jellyfin
    environment:
      - TZ=Asia/Taipei
    volumes:
      - /volume1/docker/jellyfin/config:/config
      - /volume1/docker/jellyfin/tvshows:/data/tvshows
      - /volume1/docker/jellyfin/movies:/data/movies
    ports:
      - 8096:8096
    restart: unless-stopped
Immich 的 Docker Compose
#
# WARNING: Make sure to use the docker-compose.yml of the current release:
#
# https://github.com/immich-app/immich/releases/latest/download/docker-compose.yml
#
# The compose file on main may not be compatible with the latest release.
#

name: immich

services:
    immich-server:
        container_name: immich_server
        image: ghcr.io/immich-app/immich-server:${IMMICH_VERSION:-release}
        # extends:
        #   file: hwaccel.transcoding.yml
        #   service: cpu # set to one of [nvenc, quicksync, rkmpp, vaapi, vaapi-wsl] for accelerated transcoding
        volumes:
            # Do not edit the next line. If you want to change the media storage location on your system, edit the value of UPLOAD_LOCATION in the .env file
            - ${UPLOAD_LOCATION}:/usr/src/app/upload
            - ${ABSOLUTE_LOCATION}/portfolio:/usr/src/app/portfolio
            - /etc/localtime:/etc/localtime:ro
        env_file:
            - .env
        ports:
            - '2283:2283'
        depends_on:
            - redis
            - database
        restart: always
        healthcheck:
            disable: false

    immich-machine-learning:
        container_name: immich_machine_learning
        # For hardware acceleration, add one of -[armnn, cuda, openvino] to the image tag.
        # Example tag: ${IMMICH_VERSION:-release}-cuda
        image: ghcr.io/immich-app/immich-machine-learning:${IMMICH_VERSION:-release}
        # extends: # uncomment this section for hardware acceleration - see https://immich.app/docs/features/ml-hardware-acceleration
        #   file: hwaccel.ml.yml
        #   service: cpu # set to one of [armnn, cuda, openvino, openvino-wsl] for accelerated inference - use the `-wsl` version for WSL2 where applicable
        volumes:
            - model-cache:/cache
        env_file:
            - .env
        restart: always
        healthcheck:
            disable: false

    redis:
        container_name: immich_redis
        image: docker.io/redis:6.2-alpine@sha256:eaba718fecd1196d88533de7ba49bf903ad33664a92debb24660a922ecd9cac8
        healthcheck:
            test: redis-cli ping || exit 1
        restart: always

    database:
        container_name: immich_postgres
        image: docker.io/tensorchord/pgvecto-rs:pg14-v0.2.0@sha256:90724186f0a3517cf6914295b5ab410db9ce23190a2d9d0b9dd6463e3fa298f0
        environment:
            POSTGRES_PASSWORD: ${DB_PASSWORD}
            POSTGRES_USER: ${DB_USERNAME}
            POSTGRES_DB: ${DB_DATABASE_NAME}
            POSTGRES_INITDB_ARGS: '--data-checksums'
        volumes:
            # Do not edit the next line. If you want to change the database storage location on your system, edit the value of DB_DATA_LOCATION in the .env file
            - ${DB_DATA_LOCATION}:/var/lib/postgresql/data
        healthcheck:
            test: >-
                pg_isready --dbname="$${POSTGRES_DB}" --username="$${POSTGRES_USER}" || exit 1;
                Chksum="$$(psql --dbname="$${POSTGRES_DB}" --username="$${POSTGRES_USER}" --tuples-only --no-align
                --command='SELECT COALESCE(SUM(checksum_failures), 0) FROM pg_stat_database')";
                echo "checksum failure count is $$Chksum";
                [ "$$Chksum" = '0' ] || exit 1
            interval: 5m
            # start_interval: 30s
            start_period: 5m
        command: >-
            postgres
            -c shared_preload_libraries=vectors.so
            -c 'search_path="$$user", public, vectors'
            -c logging_collector=on
            -c max_wal_size=2GB
            -c shared_buffers=512MB
            -c wal_compression=on
        restart: always

volumes:
    model-cache:
# You can find documentation for all the supported env variables at https://immich.app/docs/install/environment-variables

# The location where your uploaded files are stored
ABSOLUTE_LOCATION=
UPLOAD_LOCATION=
# The location where your database files are stored
DB_DATA_LOCATION=./postgres

# To set a timezone, uncomment the next line and change Etc/UTC to a TZ identifier from this list: https://en.wikipedia.org/wiki/List_of_tz_database_time_zones#List
# TZ=Etc/UTC

# The Immich version to use. You can pin this to a specific version like "v1.71.0"
IMMICH_VERSION=release

# Connection secret for postgres. You should change it to a random password
DB_PASSWORD=postgres

# The values below this line do not need to be changed
###################################################################################
DB_USERNAME=postgres
DB_DATABASE_NAME=immich
建立與啟動
新增專案完成後,就可以選擇專案將對應的 Docker Image 拉到本地並且建立執行環境後,啟動對應的專案,就可以在 http://<your_nas_ip_addr>:8096 看到 Jellyfin 以及在 http://<your_nas_ip_addr>:2283 看到 Immich 的初始畫面了。